Tuesday, June 27, 2017

Fix VLC MKV File Playback Issues

Have some personal MKV movies or TV shows downloaded from online video sharing sites or ripped from Blu-ray or DVD disc and wish to find a simple desktop video player software to open the MKV files on your Mac. The first choice you might take is VLC, a free media player software that offers enhanced media playback capability for various digital video, DVD and CD. However, a lot of user complain that they can't get MKV files played properly with VLC and there are many unexpected issues such as VLC MKV choppy playback or VLC stuttering, skipping or freezing when playing some high resolution MKV video. No need to worry, the following issue will show you why VLC suffer choppy MKV playback issues and the beneficial solutions to fix VLC MKV playback issues.

Why VLC suffer MKV playback choppy issues?

If you are experiencing choppy or jumpy video playback, it could be down to a couple of factors. The first is that the MKV video could be encoded with H.265 / HEVC, which is a relatively new standard still under development and VLC's support of it is experimental (as of May 2015).

The more likely cause of the problem however is down to hardware. Most content that is online in MKV is high-definition in H.264 / AVC, and if you CPU / GPU is inadequate to decode it, you will get jumpy or shaky playback.

Solutions to fix VLC MKV playback problems

1. Play MKV with VLC alternative

There are many media player software on Mac such as MPlayerX, XBMC, Plex, Perian, etc that can be used as a remarkable VLC alternative to play MKV files.

2. Disable hardware acceleration on VLC

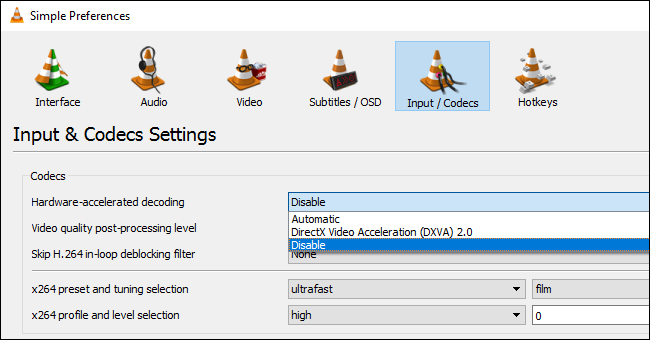
Sometimes, there will be VLC skipping issues when you are playing high-def media streaming over a network. The good news is that you can solve this problems by disabling hardware acceleration of VLC on some computers.

From the Preferences panel, click "Simple" in the lower left-hand corner, then , go to to Input / Codecs. Click the "Hardware-accelerated decoding" dropdown and choose another option, or Disable it entirely.

Disable hardware-accelerated decoding

3. Convert MKV to VLC more compatible file formats

If you fail to open MKV with VLC media player, you can try to convert MKV to VLC more compatible playback formats such as AVI, MP4, MOV to avoid those video playback issues. For Mac users, a simple to use yet powerful Mac MKV Converter - Pavtube Video Converter for Mac is highly recommended to you. The program has full support for all 4K/2K/HD/SD MKV files encoded with various different video and audio compression codec. Thanks to its batch conversion mode, you can load multiple MKV files at one time into the program at one time for conversion.

With the program, you can efficiently convert MKV file to VLC best compatible file formats with perfect quality and super fast conversion speed. To get better output video and audio quality, you can flexibly adjust output profile parameters such as video codec, resolution, bit rate, frame rate, audio codec, bit rate, sample rate, channels, etc as you like in the program's profile settings window.

Hot Search: VLC Play H.265 Files | Play 4K in VLC | Play MOV on VLC  

For Windows users, you can download Pavtube Video Converter for converting MKV for VLC playing on Windows 10/8.1/8/7.

Get Pavtube Video Converter with 20% off discount, coupon codec: 45K2D47GJH

Step by Step to Convert MKV for VLC Playback

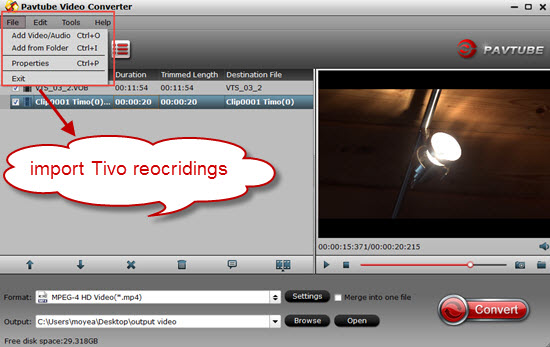
Step 1: Load MKV files into the program.

After the successful installation, click "File" > "Add Video/Audio" or "Add from Folder" to load mkv files into the program.

Load MKV files

Tips: If you want to batch load multiple MKV files, make sure to store all your files in the same folder, then click "File" > "Add from folder" or press the "Add from Folder" button on the top tool bar to batch importing them into the program.

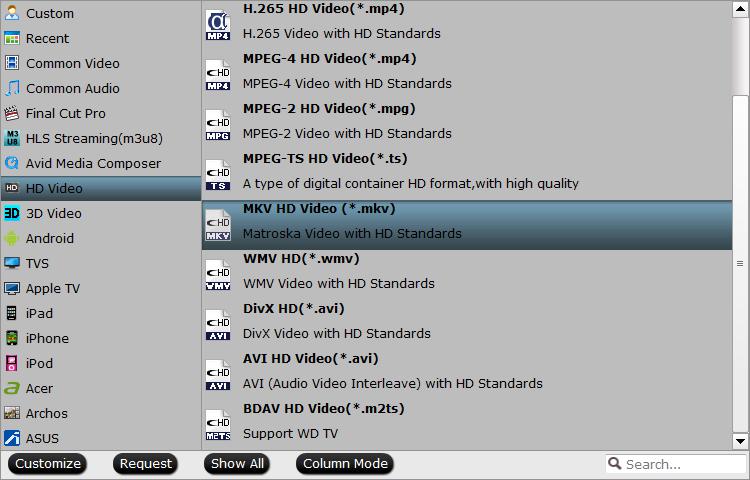
Step 2: Choose output file format.

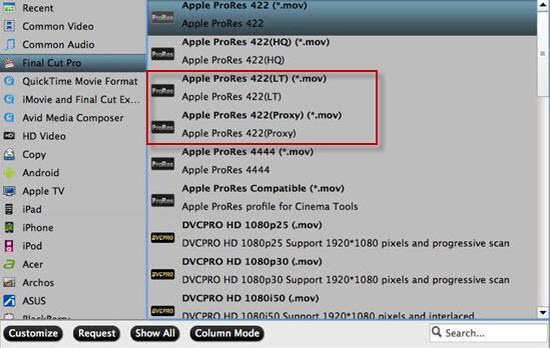
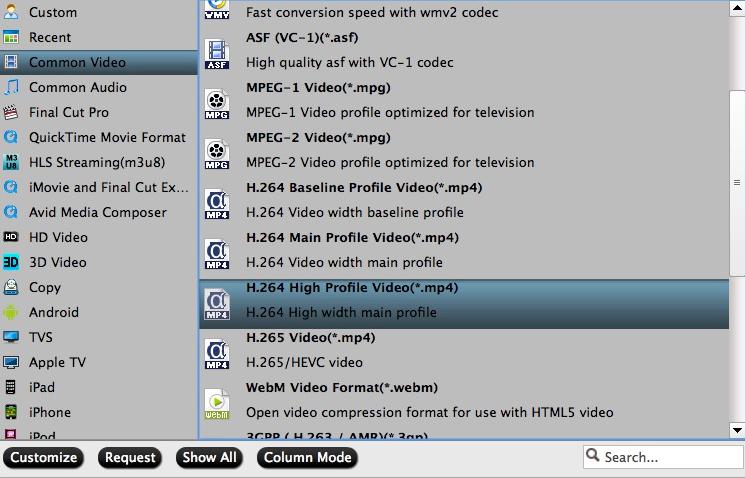
Some MKV files encoded with H.265/HEVC will lead to VLC playback stuttering or skipping issue, you can select to output one of VLC more compatible file format such as "H.264 HD Video (*.mp4)" under "HD Video" main category.

Output VLC best compatible playback formats

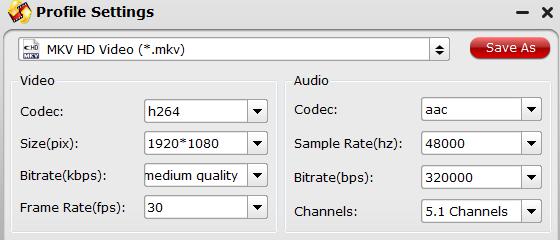
Step 3: Adjust output profile settings for VLC playback.

Click "Settings" on the main interface to open "Profile Settings" window to tweak the output profile parameter settings such as video codec, resolution, bit rate, frame rate, audio codec, bit rate, sample rate, channels, etc as you like to get better output video and audio quality for VLC.

Step 4: Start the converting process.

After all setting is completed, hit right-bottom "Convert" button to convert MKV to VLC playable video and audio file formats.

Tuesday, June 20, 2017

Convert Tivo Recordings to MKV

Have downloaded a show from the Tivo desktop app and wish to convert the Tivo files to MKV format so that you can play them on computer or portable devices with MKV player software. The following article will show you a simple workaround to get the job easily done with just few clicks.

Remove Tivo recording copy protection

To convert Tivo recordings to MKV, you will first need to transfer the Tivo recordings to your computer with Tivo Desktop. However, Tivo recordings marked with a red circle slash can usually not be transferred due to the copy protection. There are some free programs can assist you to remove commercials from Tivo recordings, one of them is the Perl program KMTTG, but you may find the process is too complicated or operate. If you are looking for a simple to use application to get the job completed, we highly recommend Pavtube Video Converter to you, which can assist you to easily remove the Media Access Key that's used to protect the Tivo recordings.

How to Convert Tivo to MKV?

Apart from bypassing the copy protection, you can also use the program to convert Tivo to MKV with perfect quality and super fast conversion speed. The program supports batch conversion mode, you can load multiple Tivo files at one time to save your precious time. You can convert Tivo files to MKV with various file resolution such as SD MKV or HD MKV and compression codec like H.264, H.265 or Xvid.

Adjust output profile parameters

To get better output video and audio quality, you can flexibly adjust output profile parameters including video codec, resolution, bit rate, frame rate, audio codec, bit rate, sample rate, channels, etc as you like.

Get Pavtube Video Converter with 20% off discount, coupon codec: 45K2D47GJH

Step by Step to Batch Convert Tivo Recordings to MKV

Step 1. Enter Media Access Key.

Install and launch the program on your computer. Click the "Options" menu from the "Tools" drop-down list, the "Options" window will pop up. Choose the "Tivo" option and enter Tivo Media Access Key.

Enter Media Access Key

Step 2. Import Tivo files.

After entering the Media Access Key, click "File" > "Load Video/Audio" or "Load from Folder" button to navigate to the folder where you save the Tivo files downloaded from Tivo recordings.

Import Tivo files

Step 3: Choose desired MKV format to output.

Clicking the Format bar, from its drop-down list, choose your desired MKV format to output, here, we select to output Tivo to a high standard MKV format - "MKV HD Video(*.mkv)" under "HD Video" main category.

Output HD MKV format

Step 4: Adjust output profile parameters.

Click "Settings" on the main interface to open "Profile Settings" window, here, you can flexibly choose or specify exactly the profile parameters including video codec, resolution, bit rate, frame rate, audio codec, bit rate, sample rate, channels, etc as you like to get better output video and audio quality.

Adjust output profile parameters

Step 5: Begin the conversion process.

After all setting is completed, hit the "Convert" button at the right bottom of the main interface to begin the conversion process from Tivo to MKV with your desired profile parameters.

When the conversion is finished, click "Open Output Folder" icon on the main interface to open the folder with generated files. Then feel free to play and converted MKV files on computer or smartphone, tablets with MKV player.

Tuesday, June 13, 2017

Edit GoPro Karma 4K Video with Premiere Pro CC

GoPro combines the Karma Quadcopter with the HERO5 Black action camera to help you capture up to 30fps UHD 4K video in MP4 file format at 24, 25, 30 fps. Looking forward to import the GoPro Karma 4K into Premiere Pro CC for doing some professional post editing workflow? The following article will show you how to get a smooth workflow of GoPro Karma 4K video with PPC.

Media compatibility of GoPro Karma 4K with PPC

The GoPro Karma Quadcopter uses the GoPro Karma 4K to record 4K MP4 with H.264 compression codec. It is well known that Premiere Pro CC and CS6 has the ability to handle 4K resolution video, in addition, it also offers native importing support for 4K H.264 file formats. However, it is well known that H.264 is a good delivery file format but no a good editing format, if you try to directly load the 4K H.264 into Premiere Pro CC, you are likely to encounter the following issues:
-Slow searching for and decoding of frames
- Frame-accuracy problems
- Crashing or freezing
- Strange artifacts or blocking on your video
- Error messages or displaying black video

Transcode GoPro Karma 4K to Premiere Pro CC native editing format

To fix above listed issue, you can download Pavtube Video Converter for Mac, which has perfect importing support for the GoPro Karma 4K H.264 video. You can batch load multiple 4K footage at one time into the program thanks to its batch conversion mode. After the 4K footage is loaded, you are enabled to rearrange the footage to the right order according to your own needs and then merge them into one file.

To assist you to get the best editing workflow with Premiere Pro CC, the program can do you a great favor to output Premiere Pro CC most favorable editing formats Apple Prores formats in various types including Apple Prores 422, Apple Prores 422 HQ, Apple Prores 422 Proxy and Apple Prores 422 LT. If you are using a slow Mac computer, you can take good advantage of the small resolution file Apple Prores 422 Proxy or Apple Prores 422 LT created by the program for smooth editing workflow of 4K video with Premiere Pro CC on slow computer.

Hot Search: Create Proxy Files with Premiere Pro

Edit GoPro Karma 4K with built-in video editing function

Don't want to move the whole video clip into Premiere Pro CC for post editing, never mind, you can use the program's built-in trim function to cut off unwanted parts. If there are blackbars around the video frame, you can use the crop function to remove them off. In addition, you can also add external subtitle to the video.

For your convenience, the program is available on both Windows (get Windows version) and Mac platform. In addition, the program has perfect compatibility with the new Windows and Mac OS. Unlike other lower quality conversion tool on the market, the program is very safe and clean, it doesn't feature any any ads or bundled adware. What's more, the quality of the converted video is pretty high quality, you can't tell the difference between the result file and the original source video.

Get Pavtube Video Converter for Mac with 20% off discount, coupon codec: 45K2D47GJH

How to Convert GoPro Karma 4K for Premiere Pro CC for Best Editing Workflow?

Step 1: Load GoPro Karma 4K video into the program.

Open the program, click "File" menu, from its drop-down option, select "Add Video/Audio" to load GoPro Karma 4K video to the program.

Load GoPro Karma 4K video

Step 2: Define the output format.

Clicking the Format bar, from its drop-down list, you can choose one of Premiere Pro CC compatible Intra-frame editing format such as Apple Prores format. If your computer is powerful enough to handle 4K video, it would be ideal for you to choose "Apple Prores 422(*.mov)" or ""Apple Prores 422(HQ)(*.mov)" for high quality performance on Premiere Pro CC.

Output Apple Prores 422 or 422 HQ

If you have a underpowered computer, it is ideal for you to output "Apple Prores 422(Proxy)(*.mov)" or "Apple Prores 422(LT)(*.mov)" format.

Output Apple Prores 422 LT or Proxy format

Step 3: Trim/Crop/Add subtitle to 4K files.

Select an item on the main interface to activate the "Video Editor" function, in the opened "Video Editor" window, you can trim or cut off 4K video length, crop to remove black frame or insert external subtitle to it.

Edit GoPro Karma 4K video

Step 4: Start the conversion process.

Go back to the main interface, hit right-bottom "Convert" button to start to convert GH5 4K video to Premiere Pro CC best favorable 4K editing formats.

When the conversion is completed, feel free to import video to Premiere Pro CC for professional post-production workflow on either powerful or slow computer.

Tuesday, June 6, 2017

Play 4K Video on iPhone/iPad

Have just recorded some 4K footage with your 4K camera, apart from viewing the 4K footage on your 4K TV, you may also come the idea to transfer and watch them on your iPhone/iPad on the move. The following article will show you how to get different types of 4K video played on iPhone/iPad.

Can your iPhone/iPad handle 4K resolution video?

From Apple's official website, we get the information that you can view compatible 4K video on the following iPhone or iPad models:
iPhone 6, iPhone 6 Plus, iPhone 6S, iPhone 6S Plus, iPhone 7, iPhone 7 Plus, iPhone 8
iPad Air 2, iPad Mini 4, iPad Pro, New iPad 2017, iPad Mini 5

If you are using previous version of iPhone or iPad, then the device will automatically downscale 4K video to 1080p, which not ensure you a good result. The fact is that you can get clearer pictures when you choose to directly view videos with HD resolution on a iPhone or iPad that support maximum resolution of 1080p.

Play unsupported 4K video on iPhone/iPad

Sometimes, even if you try to play 4K video on those iPad or iPhone models that supports 4K resolution playback, you may still end up with failure. The main reason is both iPhone and iPad can only playback very limited 4K video file that meets the following standards:
- H.264 video up to 4K, 30 frames per second, High Profile level 4.2 with AAC LC audio up to 160 Kbps, 48kHz, stereo audio or Dolby Audio up to 1008 Kbps, 48kHz, stereo or multichannel audio, in .m4v, .mp4, and .mov file formats

Therefore, if you happen to own a 4K video with the codec or format of H.265, Prores, MXF, AVI, WMV, MKV, MOV, XAVC, XAVC S, etc, your iPhone or iPad will fail to open that video. In addition, sometimes, even if you have got a 4K video with compatible file format and codec, you may still encounter other playback issues due to the incompatible frame rate, bit rate, aspect ratio, sample rate, audio codec, etc. If you are looking for a comprehensive solution to fix all those format and settings incompatible issue, you can have a try at Pavtube iMedia Converter for Mac, which has full support for all the unsupported 4K format or codec listed above, You can not only use the program to produce iPhone or iPad playable 4K H.264 MP4, MOV or M4V file format, but also adjust other profile settings in the program's "Profile Settings" window to make them adapt with your iPhone/iPad best playback settings.

Adjust output video aspect ratio

Now all available iPhone and iPad models use a 4:3 screen display aspect ratio, however, the camera DCI recorded 4K video adopts an aspect ratio approximately 1.9:1 while the UHD 4K video adopts an aspect ratio of 16:9. When you try to view DCI 4K or UHD 4K video with incompatible aspect ratio on iPhone or iPad, there will be black bars around the video. The good news is that you can easily eliminate this problem by change output video aspect ratio with the "Crop" function in the video editing window.

How to Convert Unsupported 4K Video for iPhone/iPad Playing?

Step 1: Load 4K videos or movies.

Download the free trial version of the program. Launch it on your computer. Click "File" menu and select "Add Video/Audio" or click the "Add Video" button on the top tool bar to import source 4K videos or movies into the program.

Load 4K videos or movies

Step 2: Output iPhone or iPad supported 4K video.

Scroll down the "Format" drop-down options, choose iPhone or iPad compatible 4K file formats by following "Common Video" > "H.264 High Profile Video(*.mp4)".

Output iPhone or iPad supported 4K video

Step 3: Adjust output profile settings.

Click "Settings" on the main interface to adjust output profile settings to make them fit with your new iPad 2017, you can set the output video codec as "h264", audio codec as "aac", video frame rate as "30fps", video file resolution as original (3840*2160 or 4096*2160), audio sample rate as 48000hz, audio bit rate as 160000bps to make them fit with new 2017 iPad best playback settings. If you choose to output to stereo audio or Dolby Audio, please set audio bit rate as 1008000bps and sample rate as 48000Hz.

Step 4: Adjust output video aspect ratio.

Go the "Crop" tab in the "Video Editor" Window, switch to the "Advanced Mode". To change output video aspect ratio, there are several aspect ratios for you to choose from, including 16:10, 16:9, 5:4, 4:3, 3:2, and 2:1, here, just choose iPad accepted 4:3 aspect ratio. Once you select the "Display aspect ratio", the "green crop frame" will keep this ratio to crop video and you are able to preview the final effect in real time. If you want to keep the same aspect ratio in your final output files, do remember to set the Video "Size (pix)" in "Settings" section as the same ratio as display aspect ratio.

Adjust output video aspect ratio

Step 5: Begin the conversion process.

After all setting is completed, hit the "Convert" button at the right bottom of the main interface to begin the conversion process from 4K Video to iPhone or iPad compatible 4K playback formats and settings.

When the conversion is finished, click "Open Output Folder" icon on the main interface to open the folder with generated files. Launch iTunes on your Mac computer, add converted files to iTunes library, then connected your iPhone or iPad to the Mac computer, sync the files to iPhone or iPad via iTunes for viewing on the move.